How to Manage Your Amazon PPC Without Software
Amazon ad costs are likely one of biggest manageable expenses in your Amazon business. When you have 2 or 3 campaigns, you can easily manage them using the Ads interface. But once you get beyond this, you need some way to manage your ads in bulk. Yes, PPC Software exists, but IMO most smaller sellers have a much better alternative than PPC Software—Bulk Operations within Ads.
In this article, we'll review how to use Bulk Operations to manage your Amazon ads.
Why You Shouldn't Use Software to Manage Your PPC
So why would you use (ugg) spreadsheets to manage your ads and not software? Here's why:
- Most Amazon PPC software will raise your ad costs.
- Most Amazon PPC software is difficult to set up and use.
- Most Amazon PPC software is expensive.
The reason I advocate many sellers to use spreadsheets as opposed to software is that for most sellers, using PPC software will cost them more money.
I know it doesn't make sense at first. PPC software automates your keyword bidding and automatically removes non-performing keywords so it should reduce costs. But in my experience, for both my company's accounts and other sellers I've seen, software makes a seller's PPC less efficient. Why?
I don't know exactly why Amazon PPC software ends up hurting a business but here's my theory: PPC software looks at historical performance and that performance can either be too long or too short to respond to volatility.
For example, let's consider that you sell a blue boat cover. Traditionally, the search term “blue boat cover” has been your best performing keyword. All of a sudden, in a one-month period, you rack up 100 clicks and zero sales. A PPC software would say “well this keyword sucks for you now, so we're going to make it a negative.” But what happened is you ran out of blue boat covers during that time but Amazon was still advertising red boat covers in that same ad group.
Yes, you should have that blue boat cover in a separate ad group from the red boat cover. Yes, you should review all the changes your PPC makes on a weekly basis. But in reality, things like this happens. Forcing yourself to review changes before implementing them via spreadsheets avoids these errors.
If you're running 2,000 SKUs over multiple accounts, of course you have no choice but use software. But for many sellers running small catalogs, PPC software will hurt you.
What Is Amazon Advertising Bulk Operations?
Quite simply, Bulk Operations use spreadsheet to manage your ads in bulk.
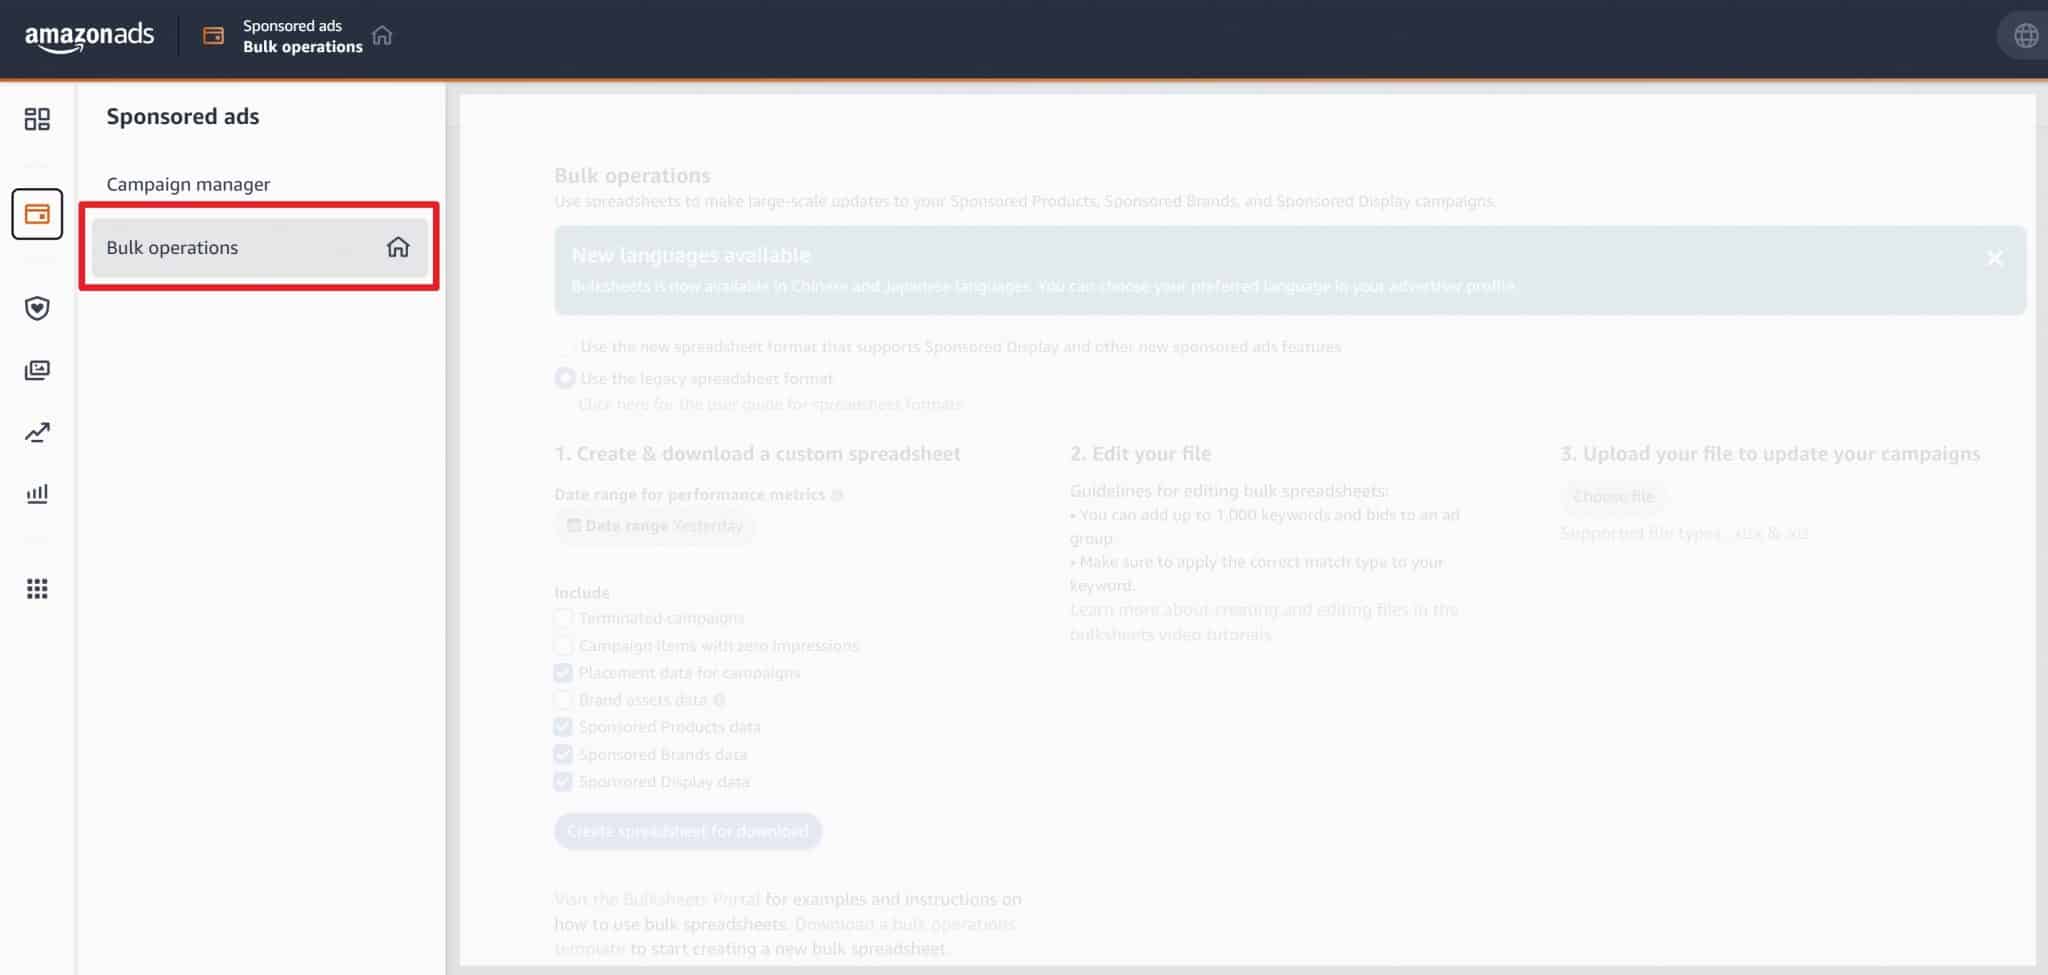
To get to Bulk Operations, you go to Advertising -> Sponsored Ads -> Bulk Operations.
Why should you use spreadsheets and not software to manage your ads?
Use Bulk Operations for Keyword Adjustments
You can use bulk operations to create and manage everything to do with your ad campaigns. Don't do this.
I recommend you to use Bulk Operations to do the fundamental part of your PPC management: keyword bid adjustments and keyword negativing. Keep it simple.
This means you should set up your ad campaigns within Advertising Central yourself. Don't use Bulk Operations to create ad campaigns.
Choose Your Bidding Rules
At the heart of every Amazon PPC software is bidding rules.
These bidding rules come down to three things:
Increase the bid for XXX Keyword if ACoS is below XXX amount
Decrease the bid for XXX Keyword if ACoS is above XXX amount
Add XXX Keyword as a negative if zero sales after XXX clicks
Basically we want to eliminate keywords that we're bidding on that are generating no sales like the one shown below.
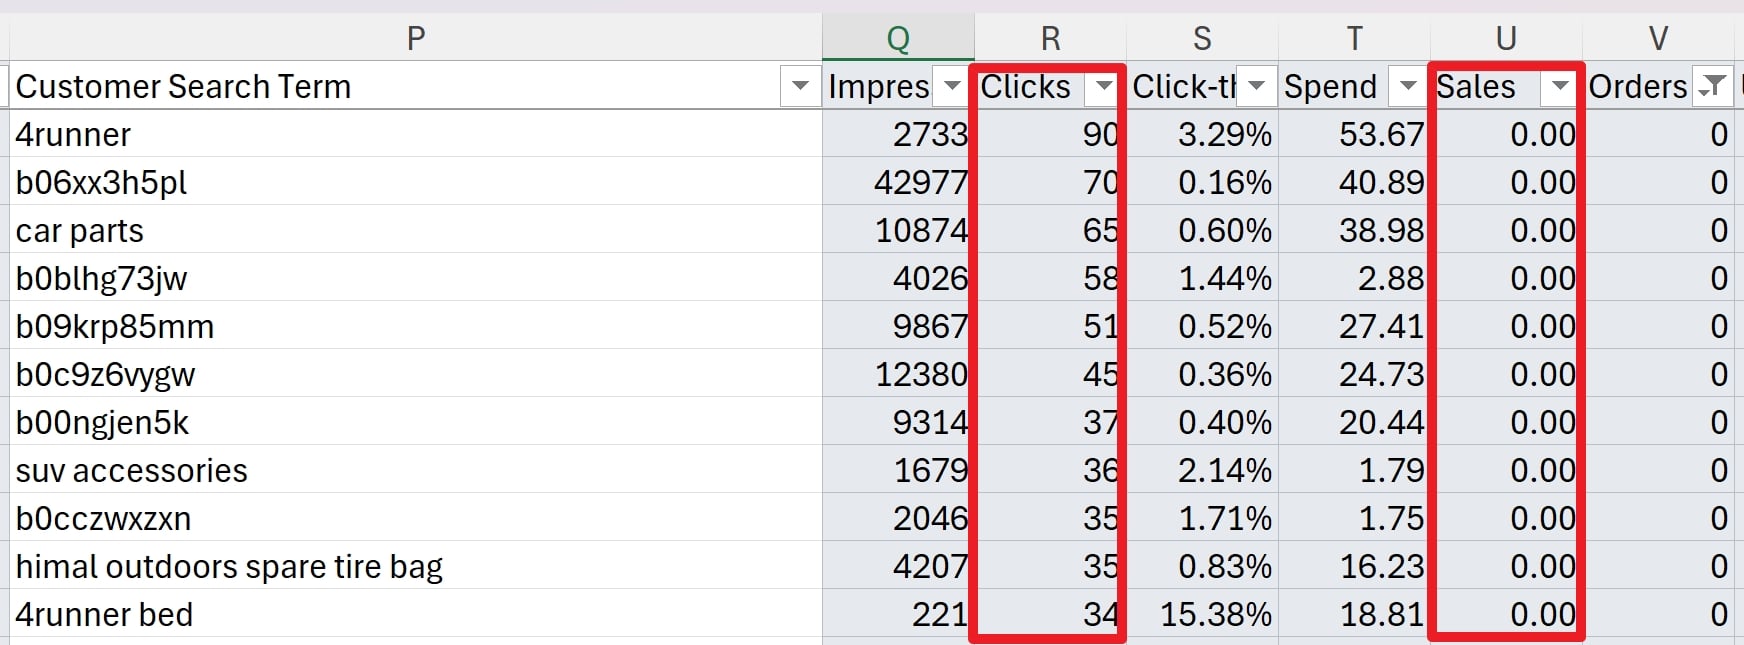
Often, we bid on these keywords through either Amazon poorly matching keywords in automatic campaigns or through inadvertent keyword match types (i.e., broad instead of exact).
The other type of easy adjustment is either lowering bid amounts based on the performance of that keyword. For keywords below your target ACoS, you want to increase bids and for keywords above your target ACoS, you want to lower bids.
How to Use Amazon Bulk Operations
The first thing to do to use Bulk Operations is to navigate to the Bulk operations page (Advertising -> Sponsored Ads -> Bulk Operations) and generate a spreadsheet template of your campaigns.
Amazon will give you some default fields to include. You can leave these as is BUT change the Date Range to be either the last 30 days or 60 days. Anything shorter is too small of a sample size.
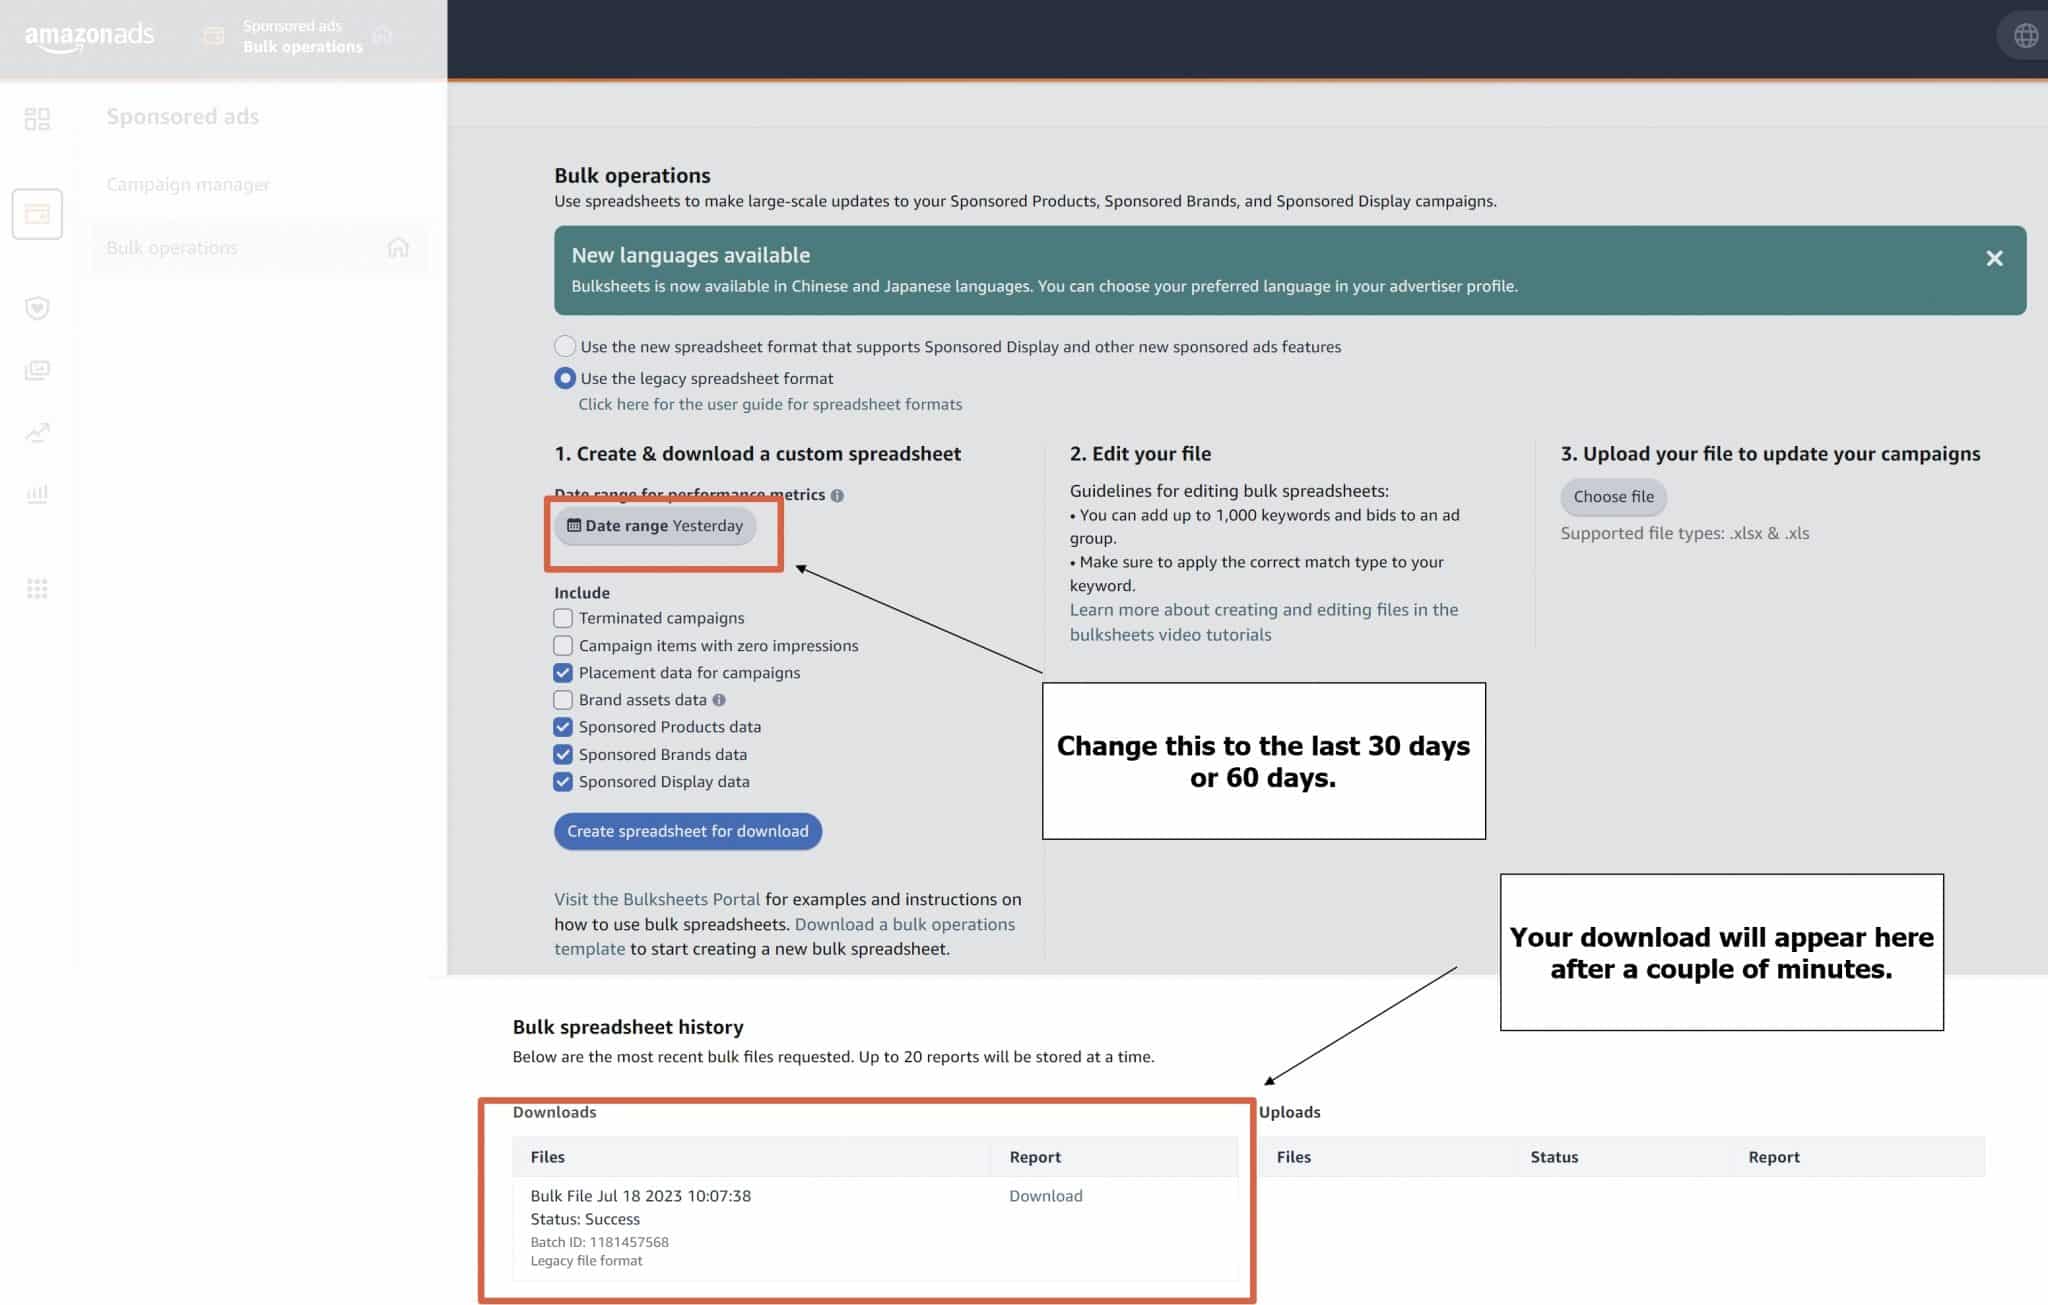
After a couple of minutes, a report will be generated that you can download and open in Excel or Google Sheets (or Truly Office for a Microsoft Excel alternative).
Record Types
Once you download the bulk sheets, you're going to get a spreadsheet with a bunch of different columns and worksheets. I recommend you to only focus on the worksheet called “Sponsored Products Campaigns.”
There is also a column called “Entity.” This will set your campaign budgets, placements, etc. The only Entity type that we care about is those that have an Entity of “Keyword.” Go ahead and delete everything else.
Improving PPC Efficiency: Lowering/Increasing Bids & Eliminating Keywords
Let's get some easy wins and eliminate wasteful keywords and increase/decrease bids on others.
Eliminating Non-Performing Keywords as Negatives
Right now, you should have a spreadsheet that has only rows of Entity type of “Keyword.” Now let's do some spreadsheet magic. Both Excel and Google Sheets include a filter option which will filter your records based on certain criteria.
We want to filter our records to only show Keywords that have 0 sales and clicks greater than 20. Select all your data (CTRL-A or CMD-A on Mac) and choose filter. Then set the filters shown below.
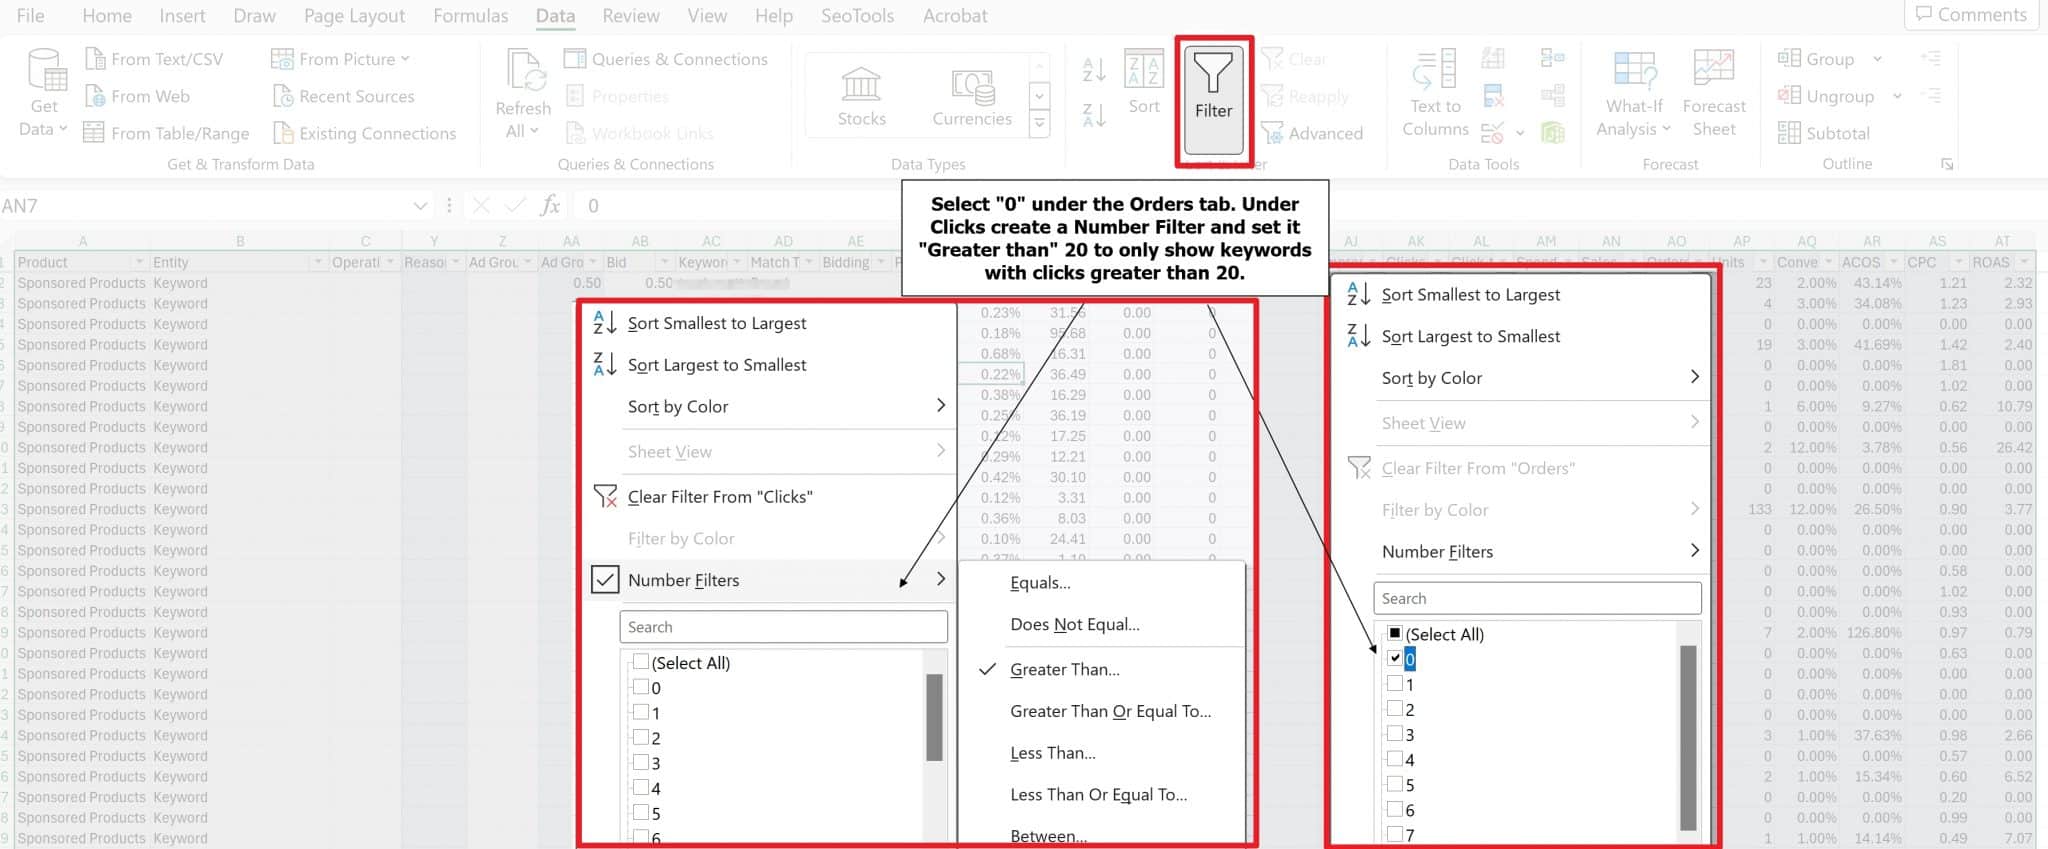
Now we are showing only our wasteful keywords, i.e., keywords with lots of clicks and no sales. Let's go ahead and add these all as negatives.
Thankfully, this is super easy.
For all of these rows, all we need to do is change a few columns (do not change anything else).
- Entity: Change it from Keyword to Negative Keyword
- Operation: Enter “Create”
- Match Type: Enter Negative Exact (or “Negative Phrase”)
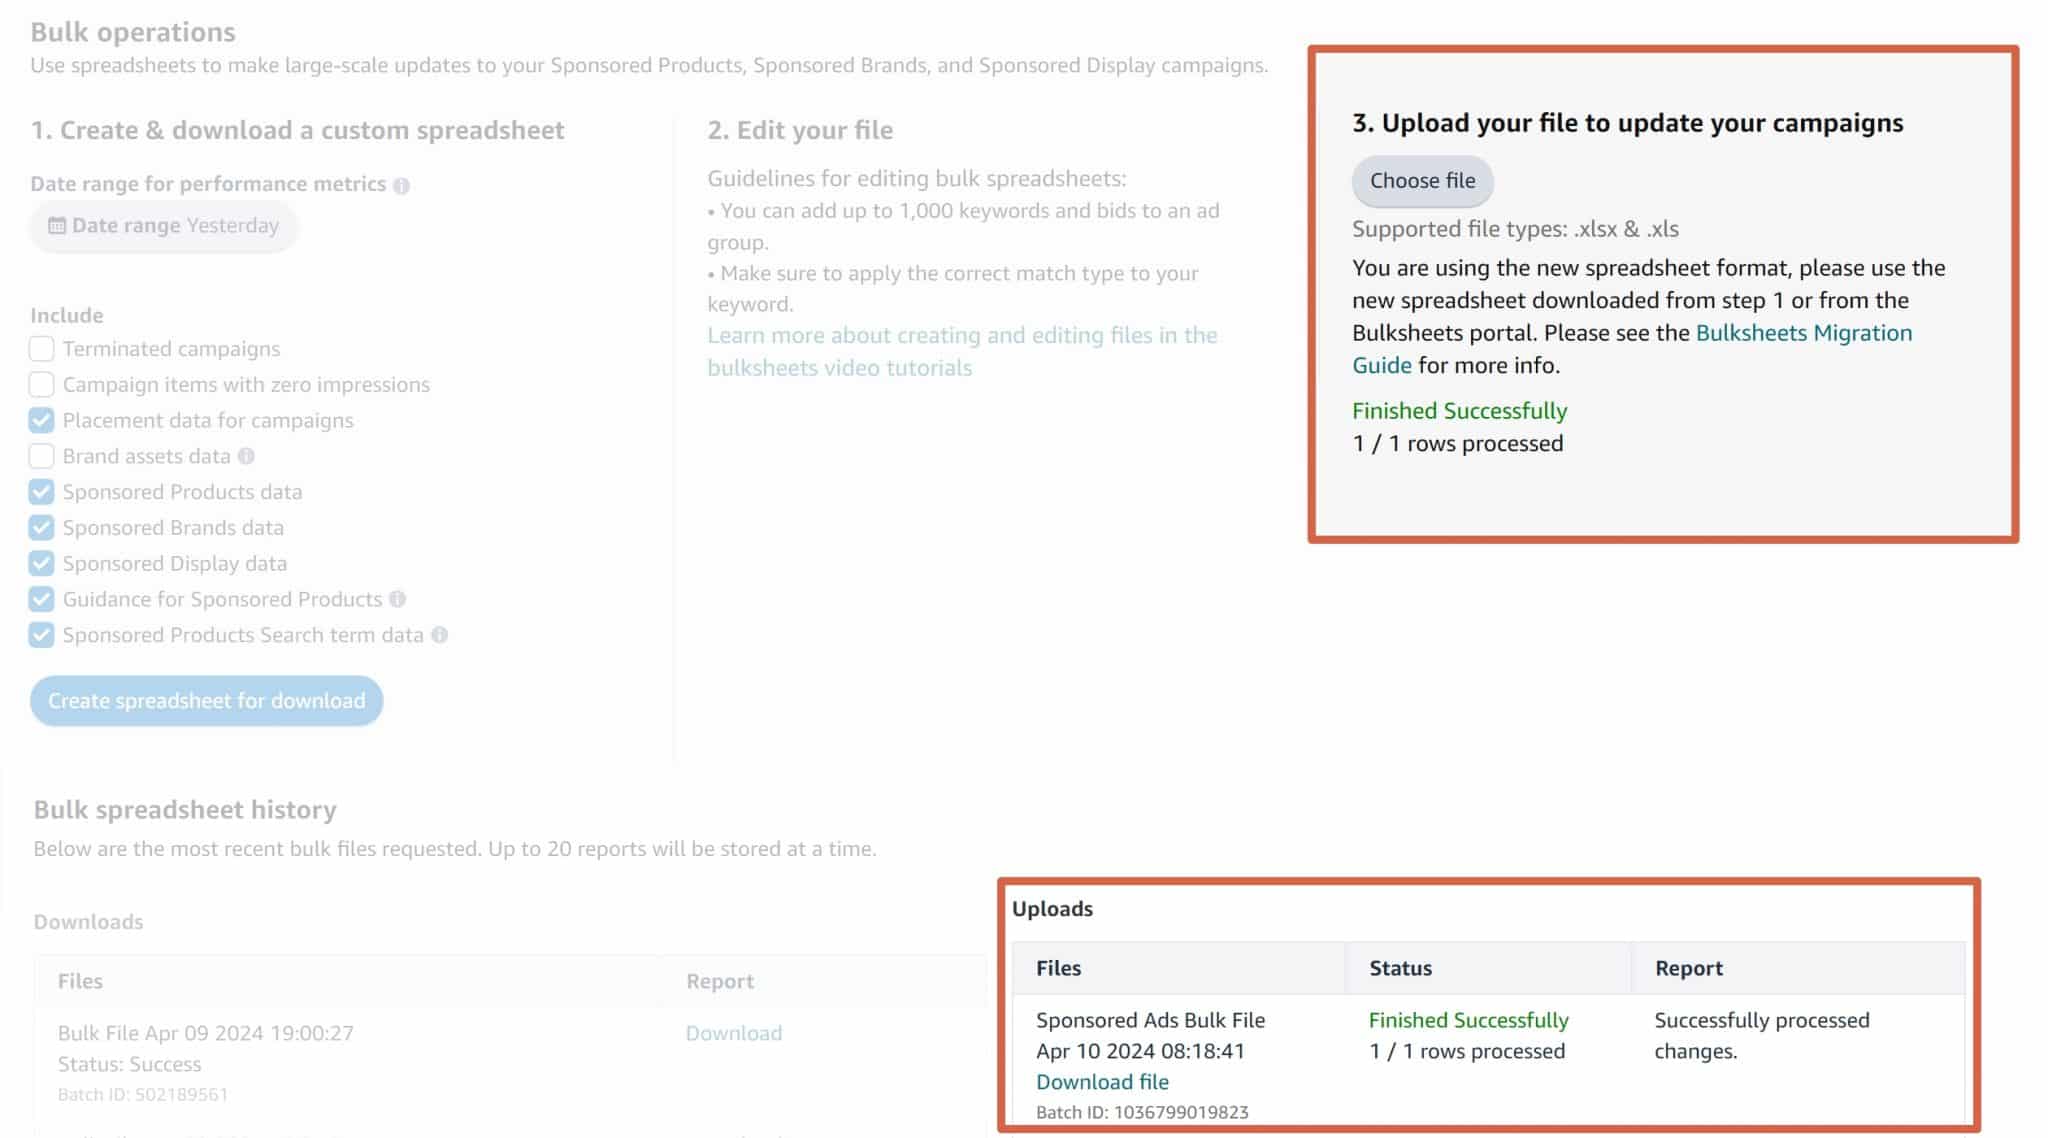
Save your Spreadsheet and go back to the bulk operations dashboard (https://advertising.amazon.com/bulksheet/HomePage) and Upload the file. Wait a couple of minutes and voila! Your keywords are now added as negatives to the selected campaign.
Increase/Decrease Bids Based on Performance
Increasing and decreasing bids is just as easy to execute but the decision-making is a little more complicated because you have to decide what an ideal bid amount is.
To figure out an ideal bid amount, you have to set either a target ACoS or ROAS. I personally prefer ACoS, and our target ACoS is 25%.
This means that if a keyword has an ACoS of 50% and has a bid amount of $0.80, I need to decrease that bid by 50% to $0.40.
The easiest way to set your ideal bid amount is to simply divide your target ACoS by your actual ACoS and multiply that number by your bid amount.
For example, let's say I'm bidding on the word garlic press and my current ACoS is 60% and my current bid amount is $1. Here's the equation I use:
Target ACoS/Actual ACoS*Current Bid Amount
In this case, it.s 25%/60% * $1 = $0.42. In other words, I need to reduce my bid by 58% to meet my target ACoS of $1.
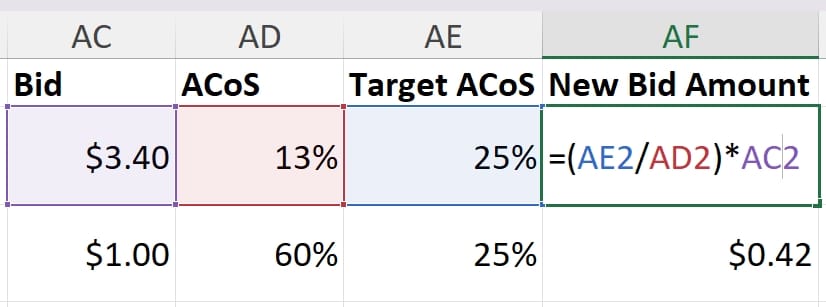
To update your keyword amounts, all you need to do is:
- Bid: Change your previous bid amount to the new ideal bid amount
- Operation: Enter “update”
Like before, go ahead and upload your changes and wait a couple of minutes for the updates to take effect.
Conclusion
There's a ton of other things you can do with Amazon bulk operations, but managing your bids and negatives is a good starting point for getting your feet wet in the world of PPC automation.
Telling someone not to use PPC software will be heresy to some and there will be many sellers that need to use software. However, if you're a 6 or low 7-figure seller, your PPC software may be hurting you more than helping you.
